
")
Companies usually use a third-party finance and accounting software program, corresponding to Quickbooks, to course of monetary and transactional knowledge for environment friendly accounting and monetary due diligence. A agency’s monetary knowledge is generally current in PDF paperwork corresponding to invoices, receipts, financial institution statements, and buy orders.
Nonetheless, monetary knowledge on this kind can’t be uploaded or imported straight into Quickbooks. Quickbooks solely helps a couple of file codecs for importing and importing monetary knowledge corresponding to Quicken (QFX), QuickBooks On-line (QBO), Quickbook Supported CSV, or Microsoft Cash (OFX).
On this weblog, we’ll learn to convert PDF paperwork to Quickbooks supported codecs such because the QBO file format or a Quickbooks Supported CSV.
We are going to check out two strategies of changing financial institution statements in PDF to QBO format.
Changing PDF to QBO by way of CSV.
On this methodology, we’ll first convert the financial institution assertion from PDF to CSV, adopted by a CSV to QBO (Quickbooks Supported CSV) conversion. Let’s undergo the steps:
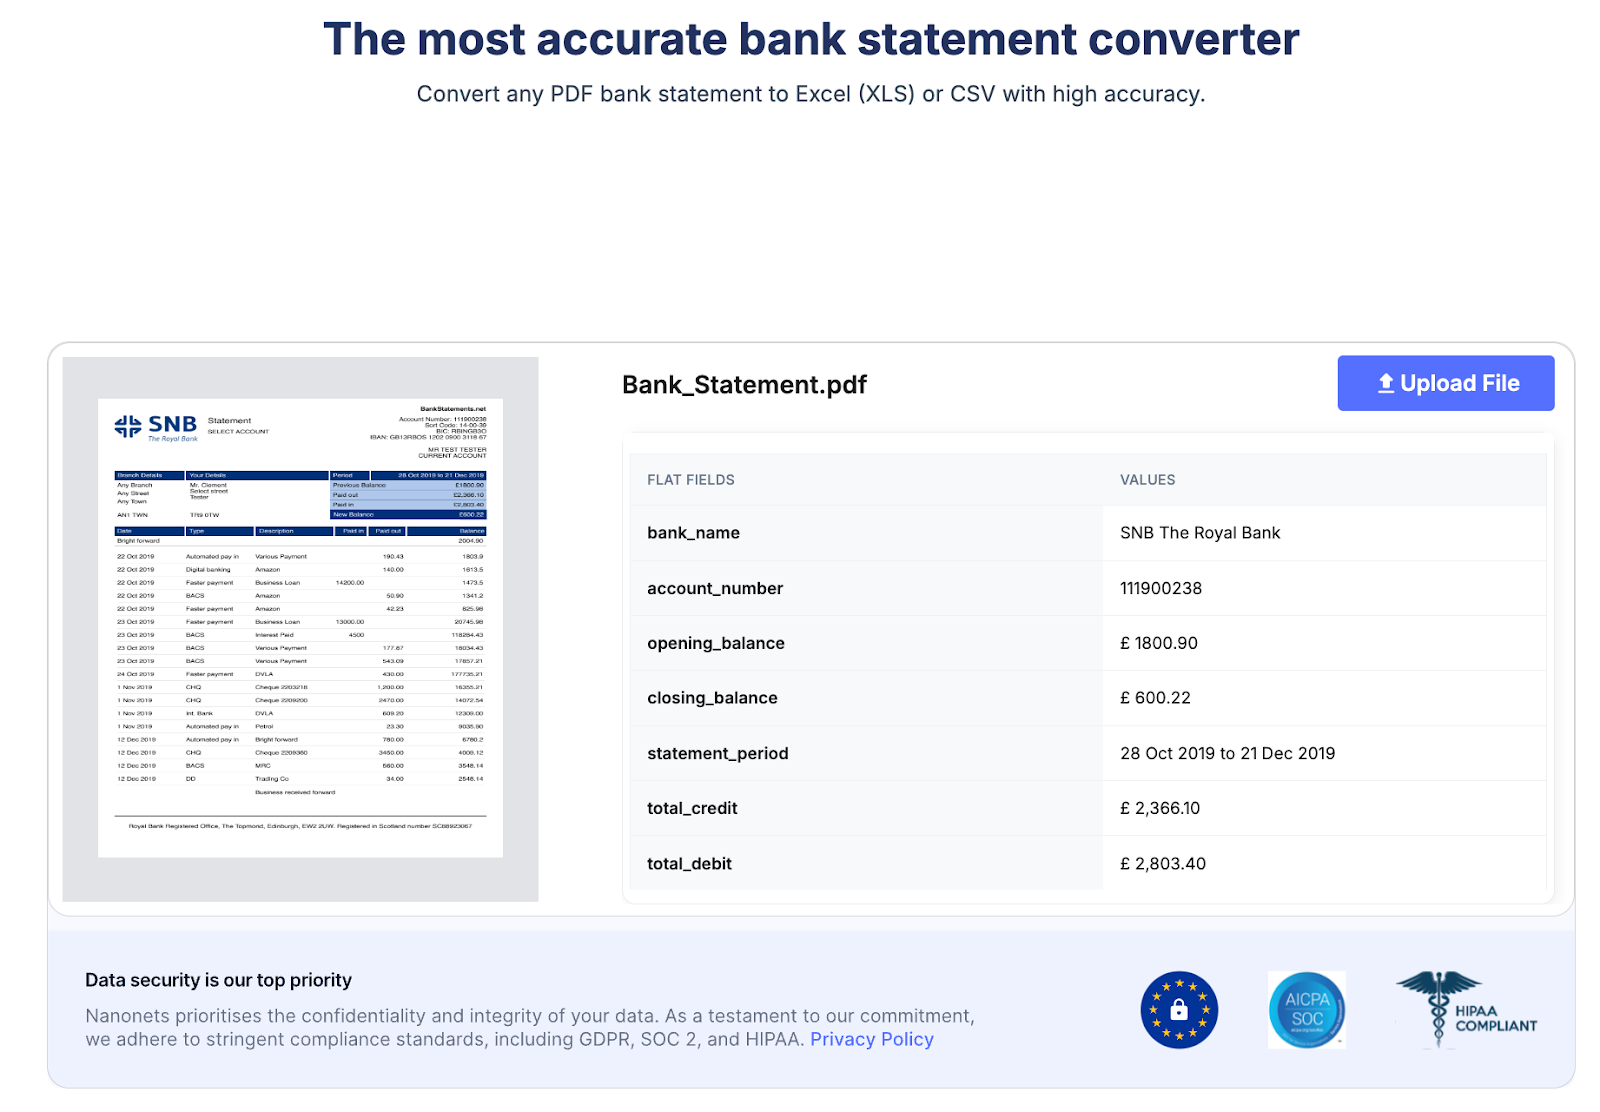
- Head over to the financial institution assertion convertor from Nanonets by clicking right here. It’s free to make use of and doesn’t require a bank card. The web page ought to appear to be the picture beneath.

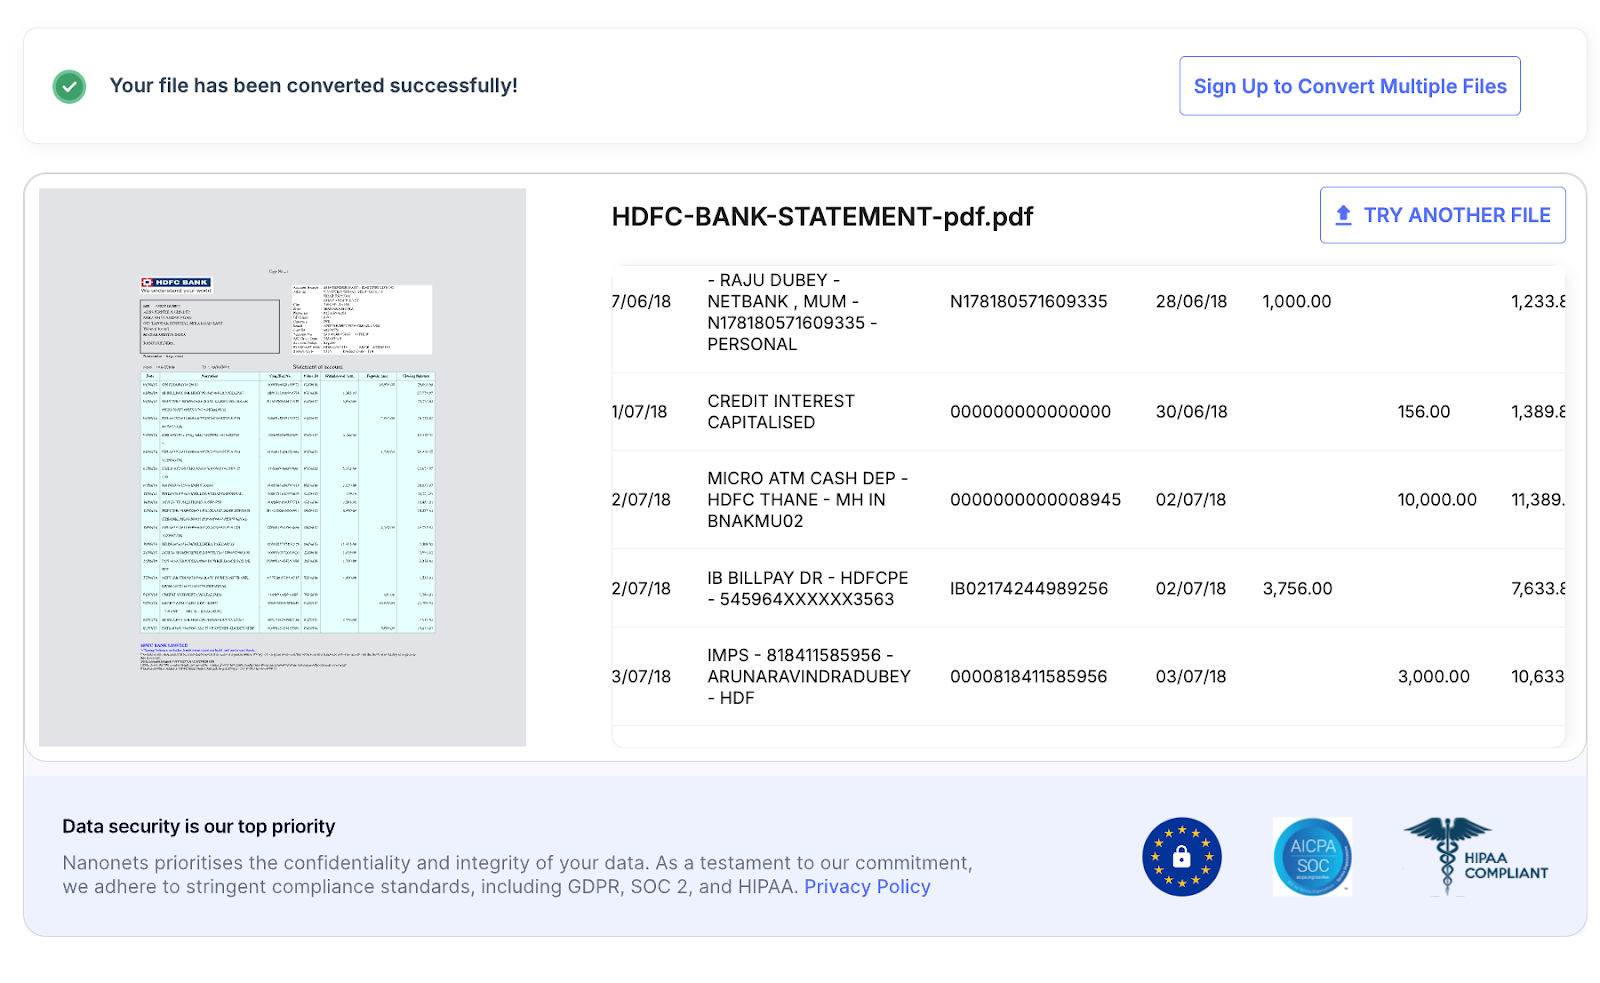
- The converter will show the extracted knowledge from the financial institution assertion. A obtain window will pop-up for downloading your financial institution assertion in CSV format.

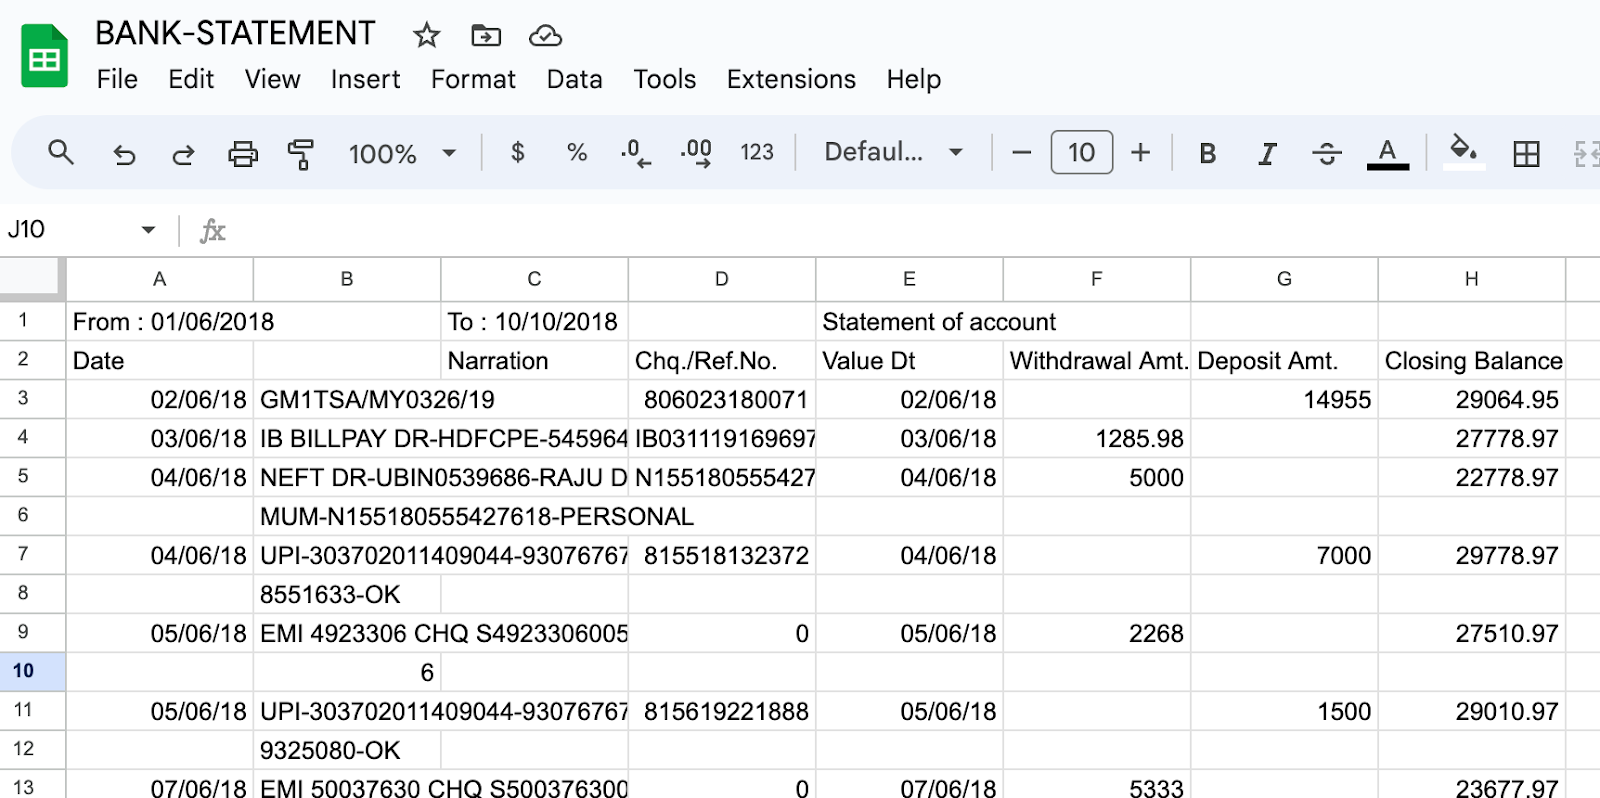
- Import your downloaded CSV file from Step 2 into Google Sheets by clicking on File->Import
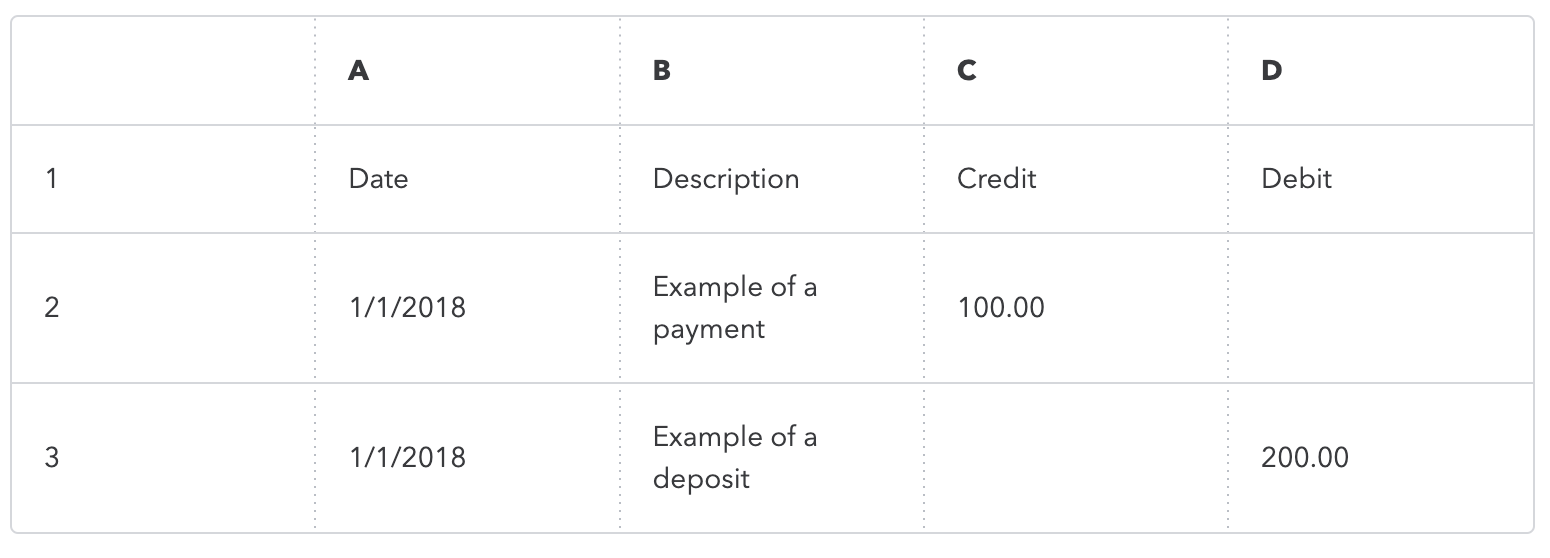
- The financial institution assertion seems to be just like the picture beneath. Take away all further textual content other than the financial institution transaction desk.

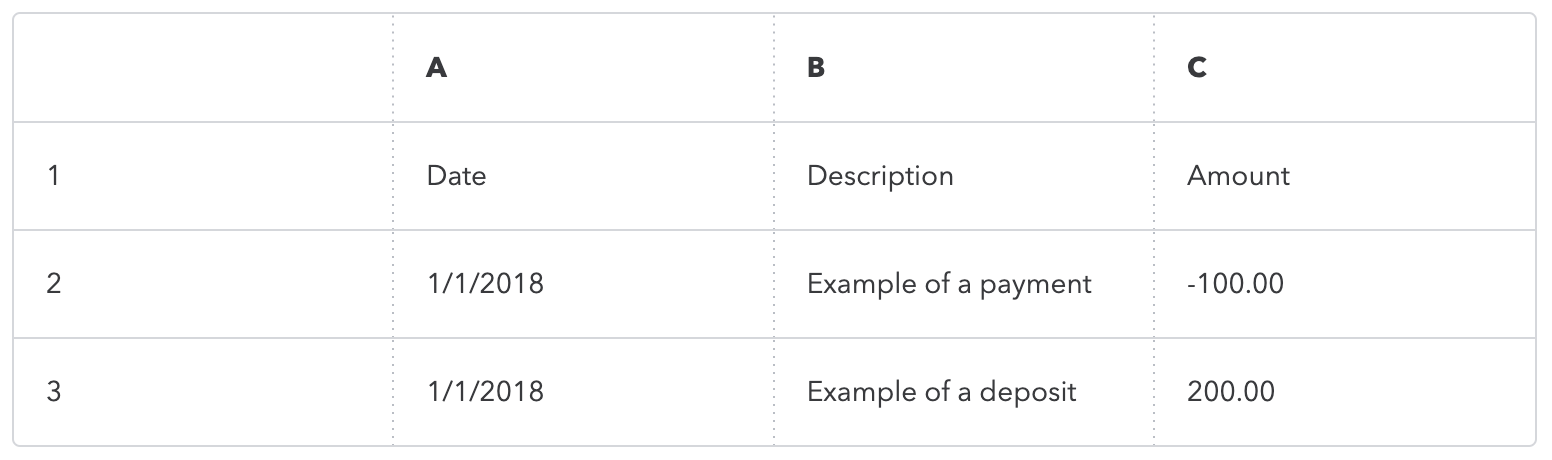
- Quickbooks helps CSV in solely two codecs. Therefore, we’ll modify our CSV in one of many codecs. Be sure that the column headers have the identical identify.
a. Three-column format: This has date, description, and quantity.
b. 4 Column Format: This has date, description, credit score, and debit.
- Put up modification, the sheet will appear to be this. We’ve eliminated further columns and have named the headers in accordance with the QBO format.

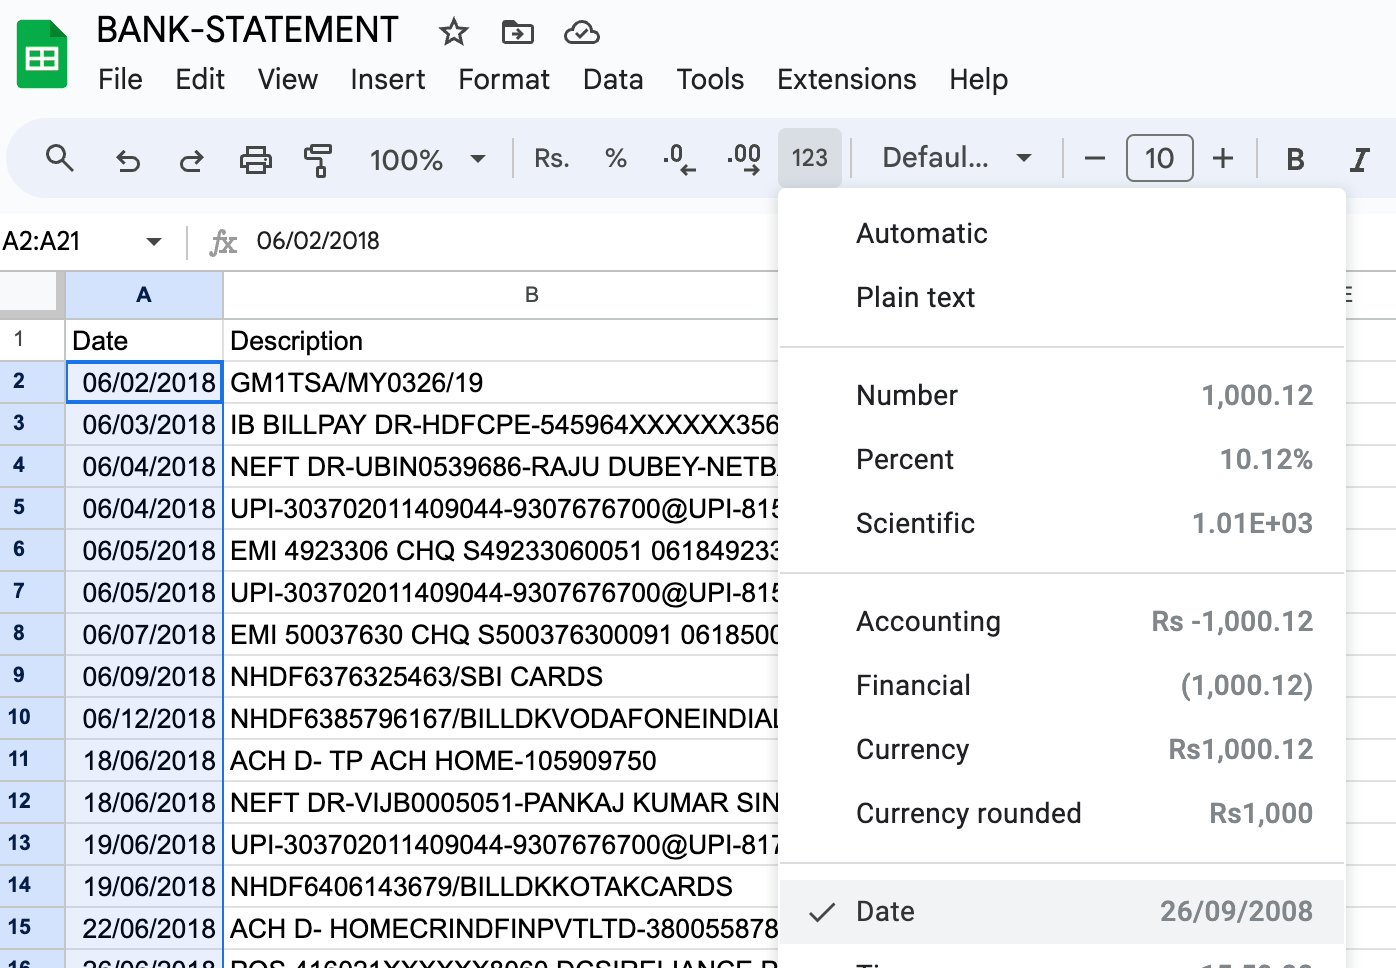
- Modify the date column to make sure that it’s in dd/mm/yyyy format. Choose all of the dates and click on on Extra Codecs (123 icon) -> Date dd/mm/yyyy format.

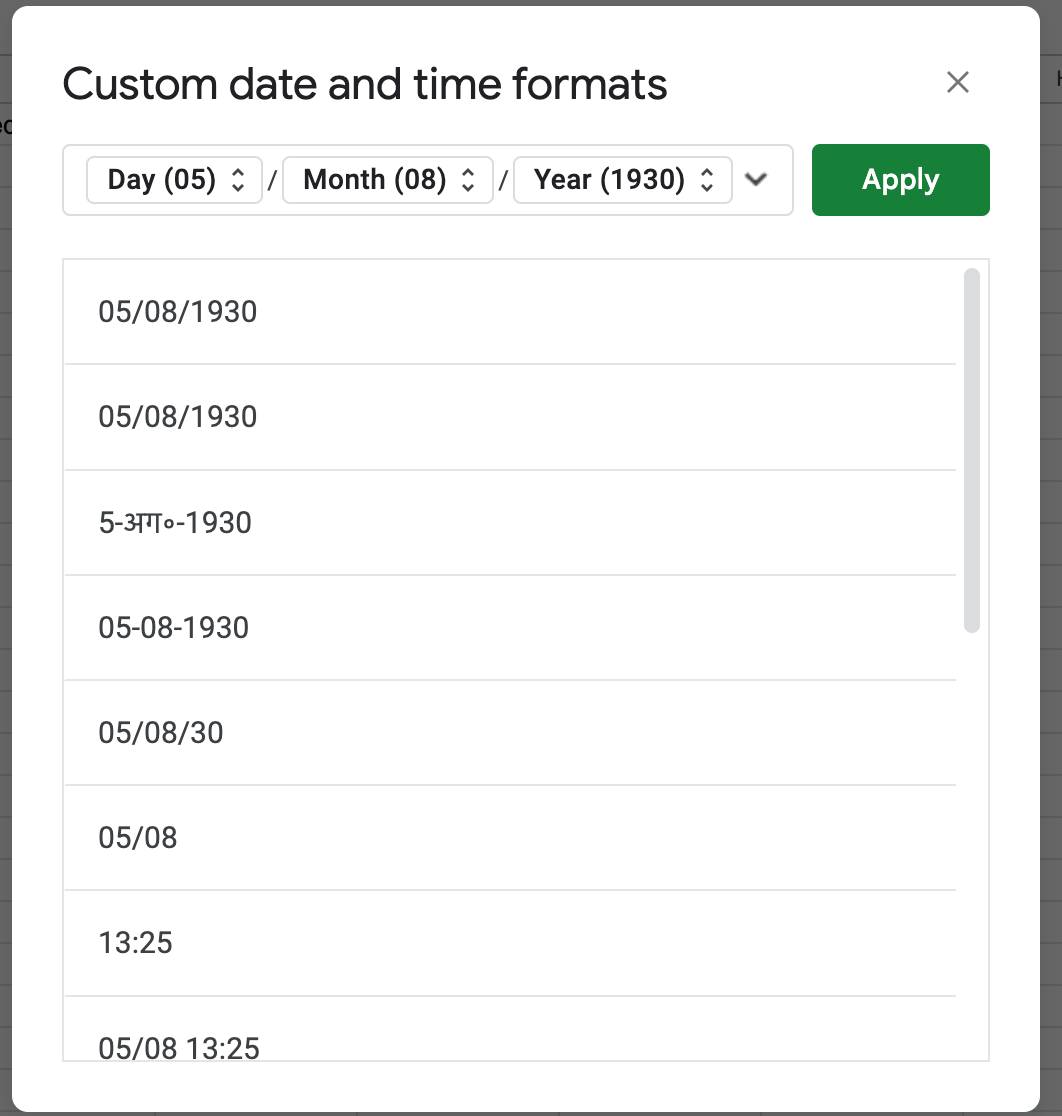
NOTE: If you don’t see this selection explicitly then click on on Extra Codecs (123 icon) -> Customized Date and Time. A window will open. Specify the date format as dd/mm/yyyy and click on on Apply.
- The financial institution assertion is now accurately formatted. Obtain it as CSV and add on the Quickbooks platform
- In the event you see an error, be sure that you:
- Take away any zeros (0) from the file. Depart these cells clean.
- Right any transactions that show numbers within the Description column
- Be certain the dates are in one format.
- Some banks add the day of the week within the Date column (for instance, 20/11/2018 TUE). It is advisable to take away the day of the week.


Utilizing Nanonets’ PDF to QBO convertor
Properly, that was a troublesome approach of changing your financial institution statements in PDF to QBO. Furthermore, the primary methodology will not be scalable as companies generate a number of of those paperwork each day. Manually changing PDFs on this format will not be the perfect utilization of human time and potential.
With Nanonets, we are able to effectively extract knowledge from financial institution statements in PDF format and mechanically export it to Quickbooks. Let’s take a look at how to do that:
- Join free on app.nanonets.com. No bank card is required.

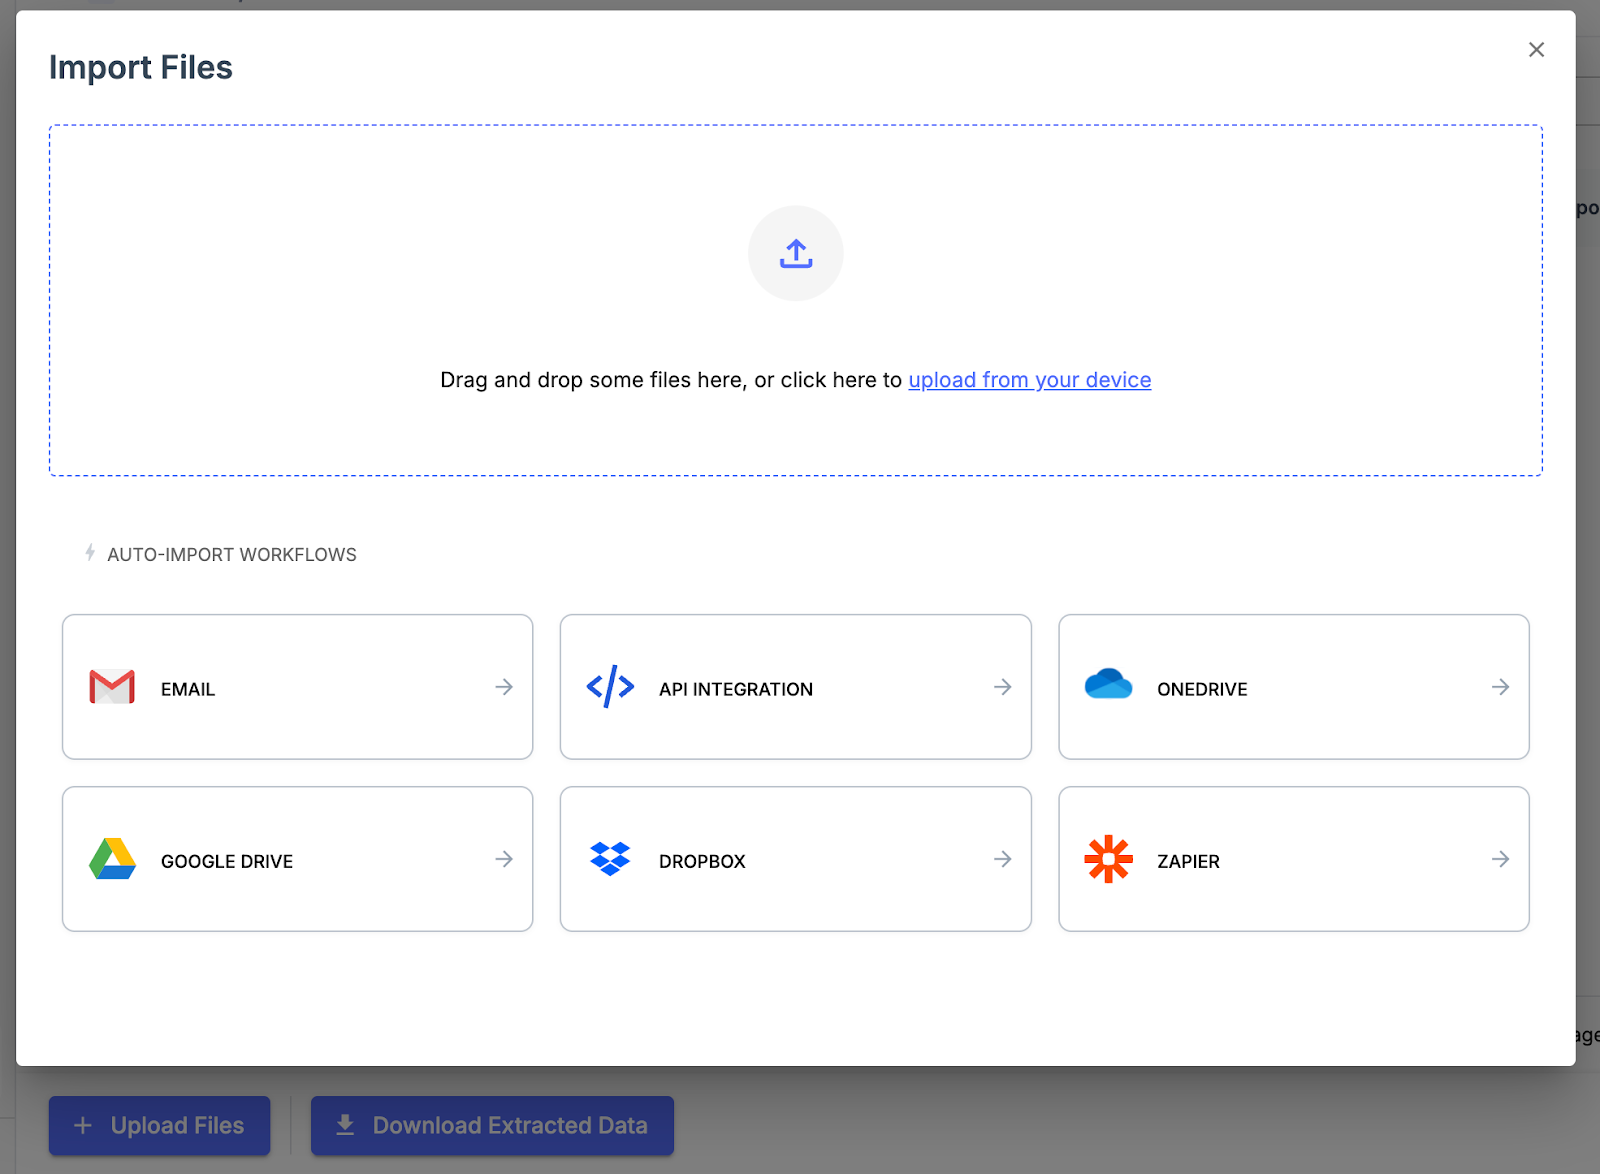
- Click on on New Workflow->Financial institution Assertion. Your mannequin will likely be created. Click on on Add to add your financial institution assertion in PDF format. You can too arrange auto-forwarding by way of electronic mail to mechanically add your financial institution statements to Nanonets.

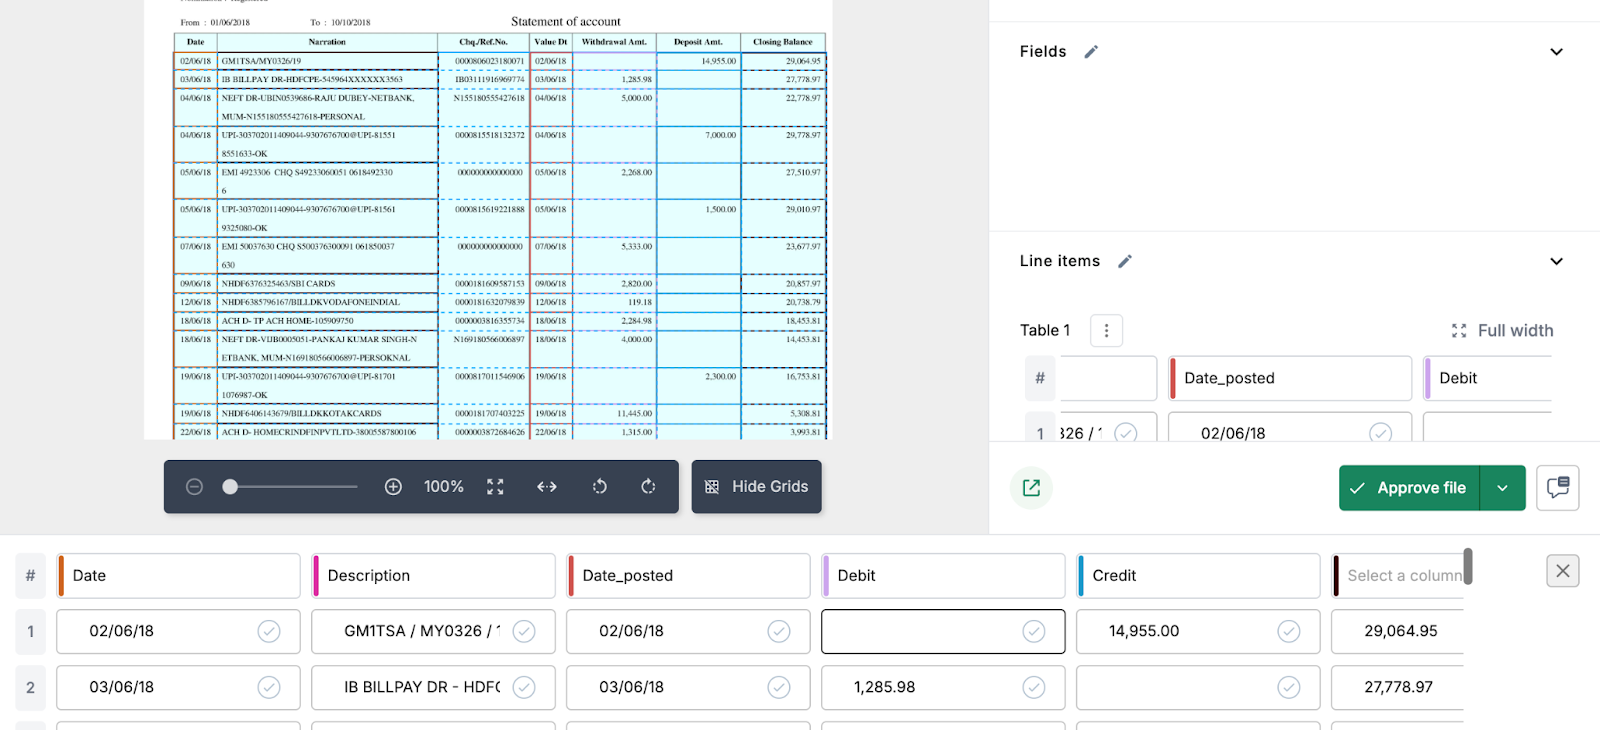
- Nanonets’ highly effective OCR extracts the info from financial institution statements.

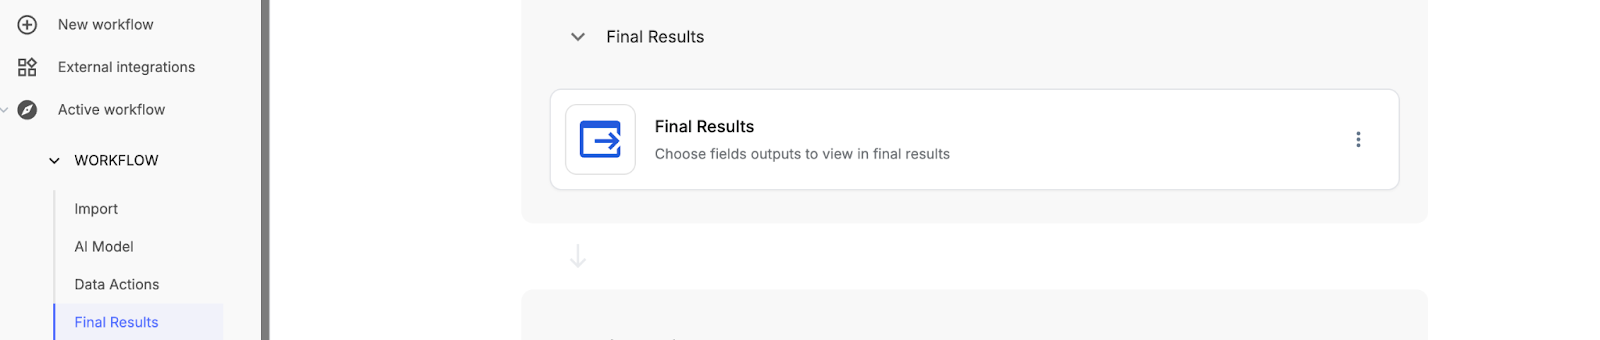
- Click on on Again->Workflow->Remaining Outcomes to pick out the fields to export to Quickbooks.

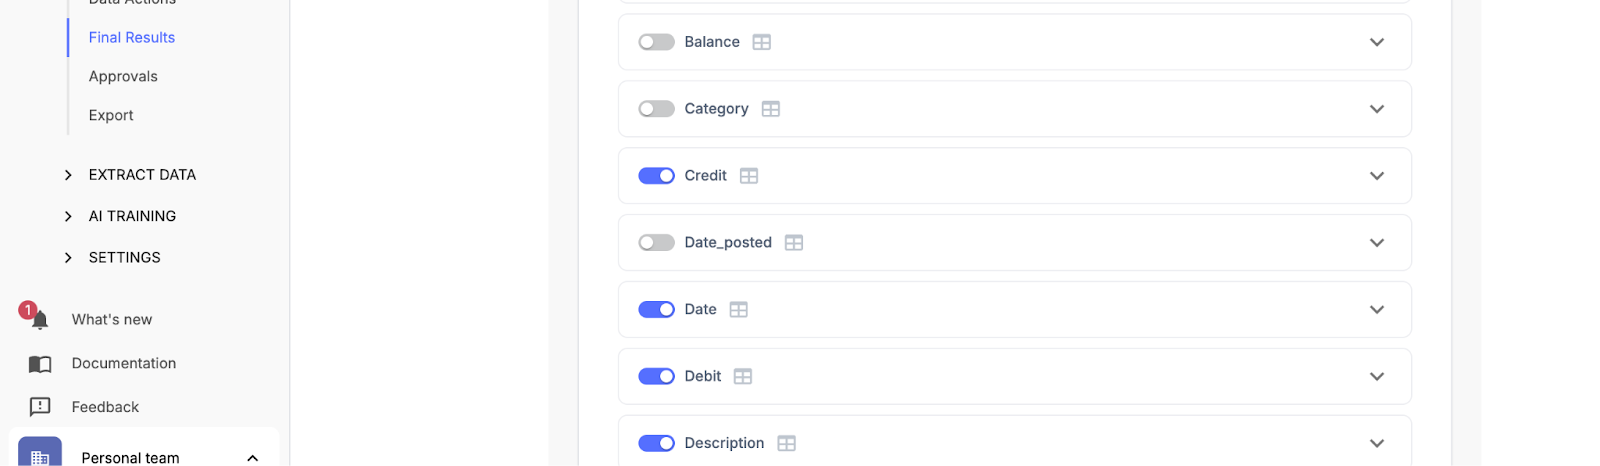
- Choose Date, Description, Debit, and Credit score fields from the Remaining Outcomes.

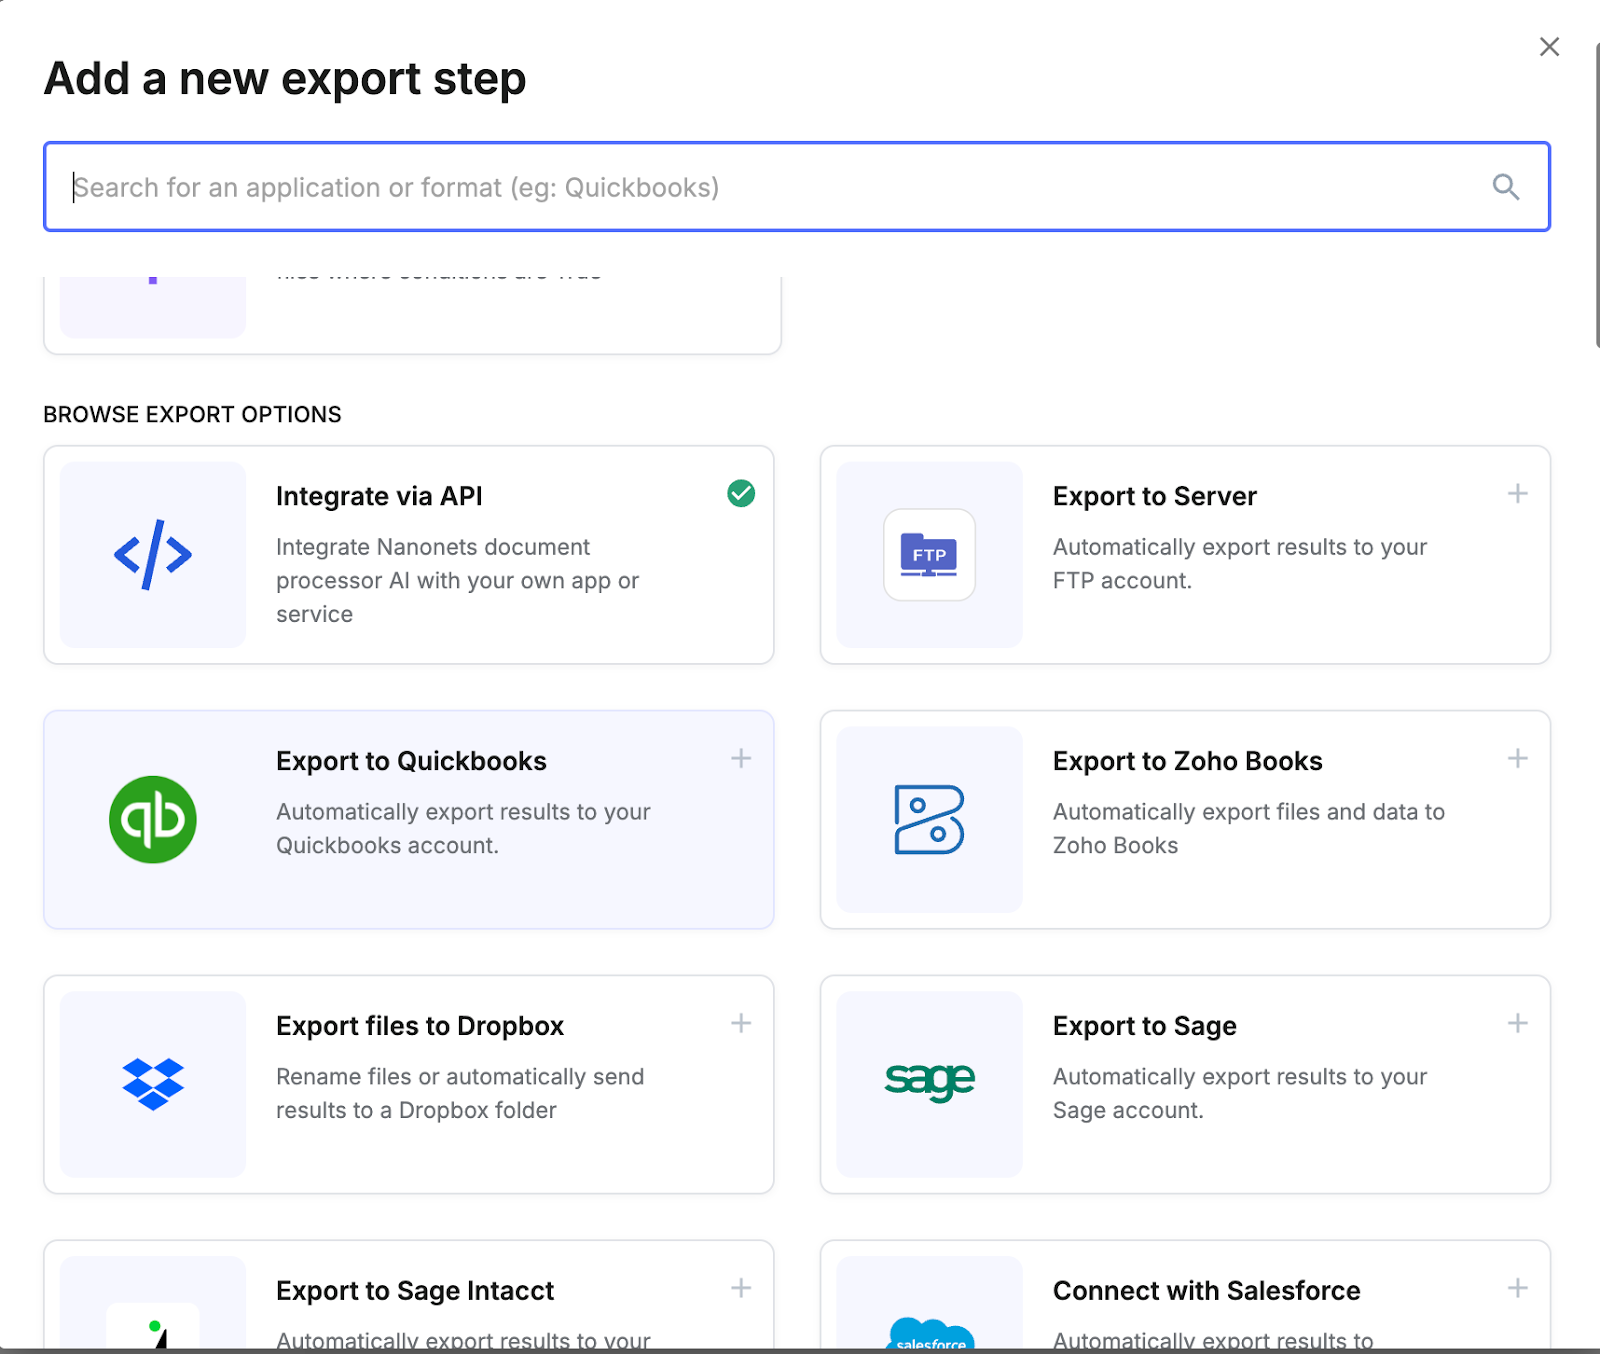
- Go to the Export part and click on on Browse all export choices. Choose Quickbooks from the window.

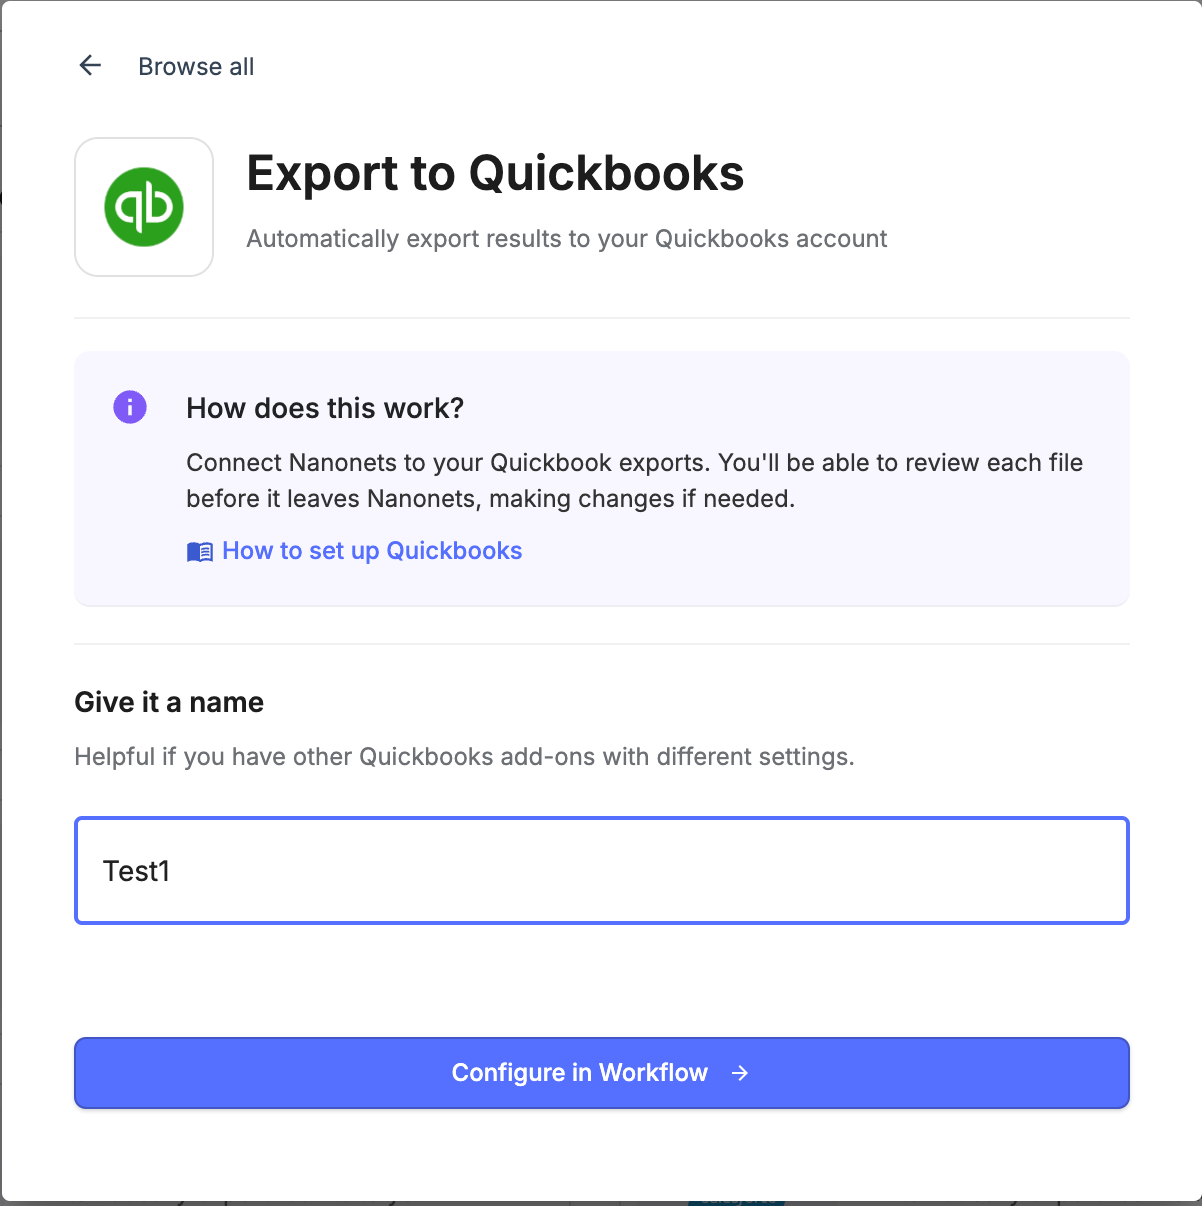
- Title your integration and click on on Configure in Workflow.

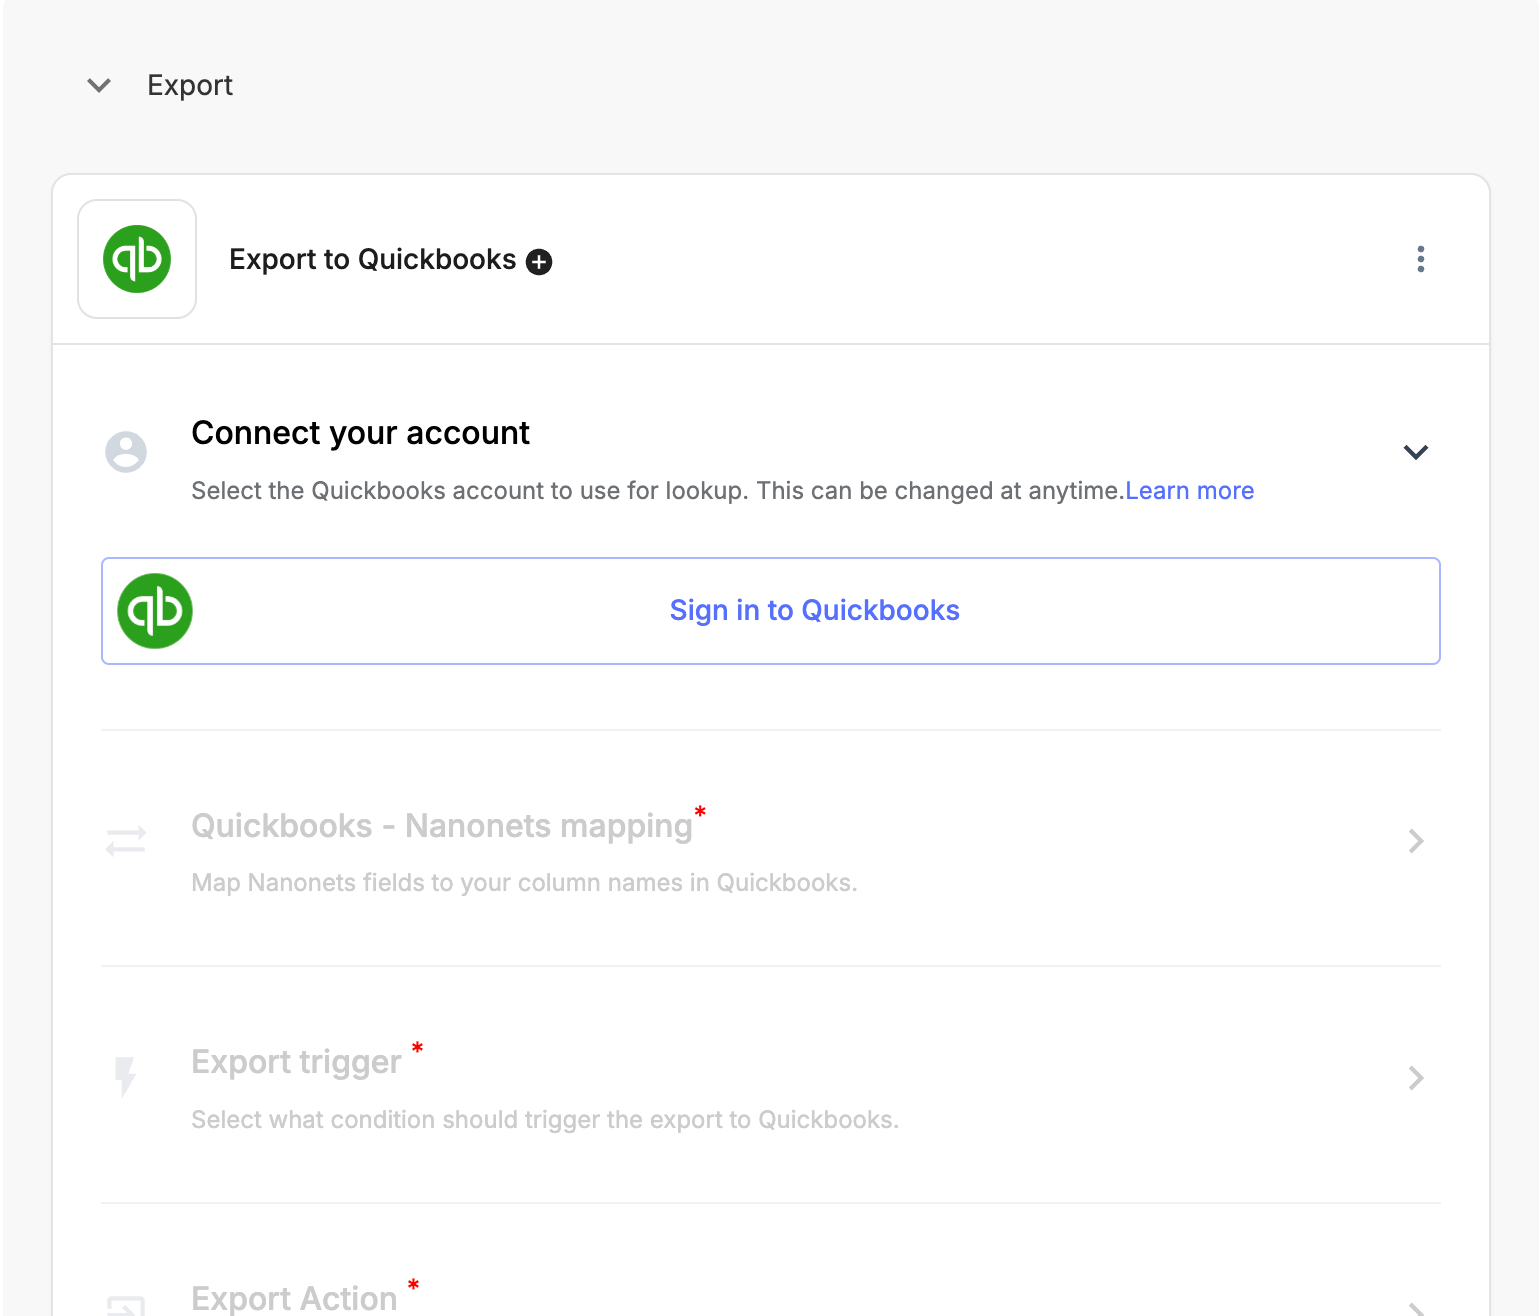
- Sign up to your Quickbooks account and comply with the directions to setup the Quickbooks integration.

- That’s it! Now you can mechanically export financial institution statements to Quickbooks with none trouble. You’ll be able to equally convert different paperwork from PDF to QBO corresponding to invoices, receipts, and buy orders.