

Apple has its causes for hiding away sure recordsdata from the common Mac person; in any case, it’s tough to interrupt one thing you’ll be able to’t see. However generally it’s worthwhile to see these recordsdata–or entry the hidden ~/Library folder–to repair one thing that isn’t working in your Mac.
Alternatively, chances are you’ll must make some area in your Mac and assume that deleting a few of these hidden recordsdata may be a great way to take action. In that case we have now a lot of ideas in Find out how to free area on a Mac in addition to Find out how to delete Different storage on a Mac, Find out how to delete system knowledge on a Mac and Find out how to delete cache on a Mac. Our recommendation is to not delete these hidden recordsdata except you actually know what you might be doing!
PROMOTION
EaseUS Knowledge Restoration Wizard | Recuperate Unsaved Recordsdata
EaseUS Knowledge Restoration Wizard simplifies the method of recovering unsaved Phrase paperwork, Excel sheets, PowerPoint displays, and PDF recordsdata on Mac. By scanning your system, onerous drive, reminiscence card, USB, and different storage media on Mac, it identifies recordsdata that haven’t been saved and presents a preview so that you can evaluation your recoverable recordsdata with ease. Now 25% OFF Unique Code: MACWORLD25.
If you happen to aren’t positive tips on how to see how a lot disk area your Mac has, learn: Find out how to verify how a lot disk area you have got.
The recordsdata you gained’t have the ability to see by default are sometimes preceded by a full cease, for instance .htaccess file, .bash_profile or .svn listing. Folders like /usr, /bin, and /and so on are hidden away, too. And the Library folder, which comprises application-support recordsdata and a few knowledge, can be tucked out of sight.
Find out how to see hidden recordsdata in macOS
A fast and simple strategy to discover secret recordsdata inside a folder is to open the Finder and press Command + Shift + . (full cease/interval), however there are different choices you may like to think about, as we clarify under.
If you not need to see the hidden folders simply press Command + Shift + . once more.
The place is the Library folder?
A number of these hidden recordsdata are situated in a Library folder, which is itself hidden from view.
Simply to confuse issues, there may be multiple Library folder, and never all of them are hidden. We’ll clarify under the variations and tips on how to discover every Library folder, together with ~/Library in your Mac.
Exacerbating the confusion is the truth that Apple has made numerous modifications to the Finder lately, so some tutorials could reference issues that merely aren’t there anymore. For instance, the Residence folder may have a house icon and doubtless no matter title you have got assigned to your Mac. You’ll discover it within the Customers folder. Neither is seen by default in macOS Massive Sur or later, however don’t fear, we’ll clarify the place to seek out them under.
Equally, the Macintosh HD is often no matter you have got named your Mac and once more isn’t seen by default. Don’t fear, we’ll clarify tips on how to make these seen!
Find out how to discover ~/Library
The primary Library folder we’ll find is the hidden one in your Residence folder. It’s generally known as ~/Library.
The Residence folder is without doubt one of the folders that’s much less simple to find than it was once, neither is it really referred to as the Residence folder. It’s almost definitely obtained your title related to it, however it’ll have an icon that appears prefer it has a home in it.
There are a number of methods to entry this Residence folder:
- Open the Finder and press Command + Shift + H.
- Alternatively, click on on Go within the menu and select Residence.
- It’s also possible to add this Residence/Consumer folder to the Finder sidebar by opening Finder > Settings (or Preferences) > Sidebar, after which ticking the field beside your username within the Favorites part.
Upon getting arrived on the Residence folder you’ll be able to press Command + Shift + . to view the hidden recordsdata together with the hidden Library folder.
One other strategy to get to this hidden Library (known as ~/Library) is to make use of the Go choice within the Finder’s menu to leap to it. Right here’s how to try this:
- Open the Finder.
- Select Go from the menu bar.
- Select Go to Folder (or Shift + Command + G).
- Kind ~/Library into the textual content field and click on Go.
If you use this technique the hidden folder can be made seen while not having to press Command + Shift + . (full cease). However after you shut the Finder window it’ll not be seen.
There’s an excellent simpler strategy to discover your hidden ~/Library/ folder. Simply is to do the next:
- Open Finder.
- Maintain down Choice and select Go from the dropdown menu bar on the prime of the display.
- You will note the ~/Library folder listed under the Residence folder. Click on on it to go straight to the folder.
Find out how to discover Library in Macintosh HD
The second library folder isn’t hidden as such, however it’s nonetheless difficult to find due to modifications Apple’s made to the Finder over time.
This Library folder is situated inside what’s sometimes called the Macintosh HD folder however yours will most likely be named no matter you have got referred to as your Mac. If you happen to don’t see a Macintosh HD folder (or no matter you have got named your startup storage system) within the left-hand column if you open the Finder right here’s what to do:
- Open the Finder.
- Click on on Finder > Settings/Preferences.
- Click on on the Sidebar tab.
- One can find your Mac listed underneath Areas. Tick/verify the field beside it.
Now you will note your disk within the Areas part of the Finder (or the Gadgets part in older macOSs). This folder contains Purposes, Library, System and Customers but in addition contains plenty of hidden folders and recordsdata.
Press Command + Shift + . to disclose them.
Find out how to discover the System Library
The third Library folder is situated in System (a kind of folders within the Macintosh HD folder we simply talked about). It comprises all of the recordsdata that macOS must run.
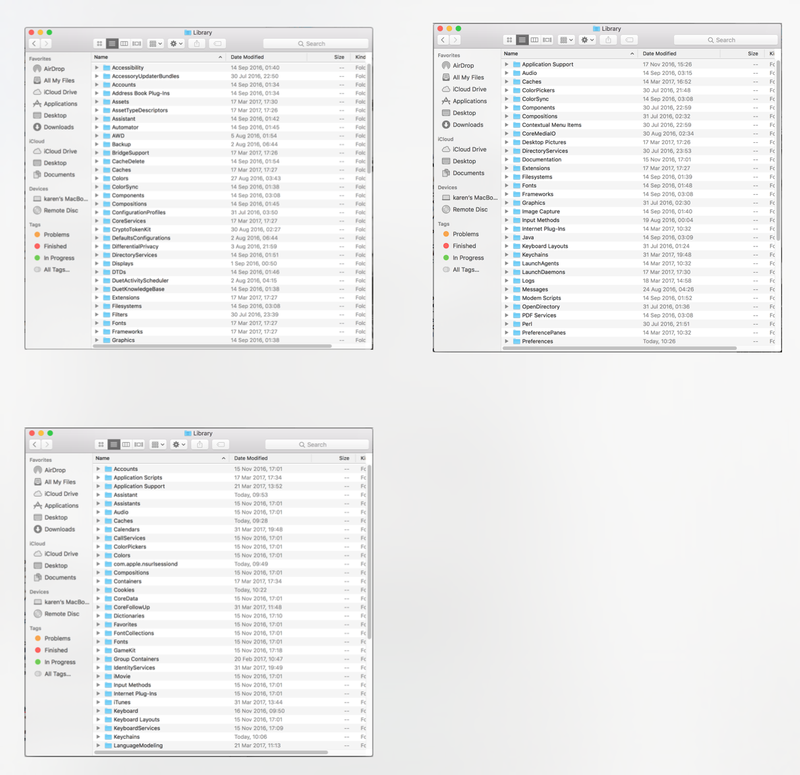
Spot the distinction : evaluate these three Library folders:
Find out how to preserve the hidden ~/Library folder seen
If you happen to use the Go technique to find the ~/Library that folder will stay seen till you shut the Finder window. Subsequent time you look it’ll have vanished once more.
If you need the folders to stay seen then you need to press Cmd + Shift + . to disclose the hidden folders. If you not need to see them click on Command + Shift + . once more.
One other strategy to preserve the hidden ~/Library folder seen is to pull the hidden Library icon from the Finder window to the Finder sidebar. It will make it accessible even after you’ve closed the Finder.
Find out how to view hidden folders utilizing Terminal
One other strategy to make hidden recordsdata and folders seen requires you to make use of Terminal.
- Open Terminal
- Run the next script:
$ defaults write com.apple.Finder AppleShowAllFiles true
$ killall Finder
If you wish to change it again, merely change the true to false.
Finest apps for making area on a Mac
In case your cause for finding these hidden recordsdata was to try to take away among the area hogs out of your system, we advocate you employ an app like CleanMyMac X. It’s what we used after we wanted to regain some area after we have been putting in macOS Massive Sur again in 2020. Learn: Don’t trouble making an attempt to replace to Massive Sur when you have a 128GB Mac.
CleanMyMac is £29.95/$29.95 (often £34.95/$34.95) in the event you purchase the plan for one Mac. There’s additionally a free trial.
Obtain from developer MacPaw right here.
Now we have a round-up of the Finest Mac Cleaners wherein we take a look at the next alternate options to CleanMyMac: DaisyDisk, MacBooster, Parallels ToolBox, and MacCleaner Professional. Learn our evaluation of Parallels Toolbox.